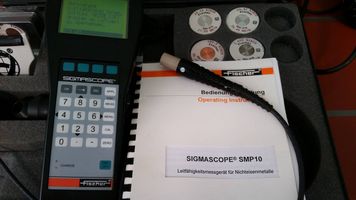
Conductivity Measurement of Non-Ferrous Metals

Examples of use:
- Classification of non-ferrous metal alloys, e.g. rough division of Al, Ti and Mg alloys
- Monitoring of hardening processes and of aluminium alloys
- Determination of the degree of purity
- Homogeneity testing
Device configuration:
- Non-destructive measurement by probe
- Measuring spot minimum approx. 10x10 mm
- Four-Point Measurement of Resistance
- Abrasion Resistance
- Flame Treatment Units
- CGME – Controlled Growth Mercury Electrode
- Digital Microscope
- ECMC – Electrochemical MiniCell
- EDX-Analysis
- Planar Plasma Sources
- Fluorination
- FTIR Spectroscopy
- GDP-C
- Cross-Cut Tester
- Grey Scale Measurement
- Gravimetric Titrator – Alino®
- Hardness Tester
- Hardness and Micro Hardness Testing
- Infrared Camera - Vario THERM
- Infrared Thermometer (Pyrometer)
- Jet Plasmas
- Confocal Microscope
- Laboratory Electroplating
- Lacquer Testing Device Carving Graver
- Conductivity Measurement for Non-Ferrous Metals
- Optical Microscope Leica DMi8 C
- Mastersizer
- Optical Emission Spectrometer
- pH Value Determination
- pH/Conductivity Meter
- Plasma Polymerization
- Potentiostat / Galvanostat / ZRA
- Contact Angle Measuring Instrument
- Scanning Electron Microscope (SEM)
- Atomic Force Microscope (AFM)
- Roughness
- Rheometer MCR 301
- Rheometer MCR 502 TDR
- Scratch Hardness Tester
- X-Ray Fluorescence Unit Fischerscope
- X-Ray Photoelectron Spectrometer XPS
- Admittance
- Coating Thickness Gauge MiniTest 4100
- Coating Thickness Gauge Quint Sonic
- Sol-Gel Unit
- Spectral Ellipsometer SE850
- Sputter Technology
- Stylus Instrument / Profilometer Alpha-Step D-600
- Stylus Instrument / Profilometer PGI1200
- Thermal Evaporation
- Universal Testing Machine
- UV/VIS Spectrometer
- UV-VIS Spectroscopy
- Wear Test
- Videoextensiometer RTSS
- Xenon Arc Test
- Zeta Potential Measurement
Manufacturer:
Helmut Fischer GmbH Sindelfingen
Model:
Sigmascope SMP10
Martin Teumer
Surface Technology
Team Leader
Electrochemistry
e-mail
Phone: +49 3641 20498 23


